Author Archives: Brian Linkletter
Author Archives: Brian Linkletter
Open-source DevOps tools are used to deploy applications and services in datacenter server networks, but they may also enable researchers or students to simulate networks. In this post, we will survey popular open-source DevOps tools and provide links to information that shows how to use them to create network simulation scenarios.
Most open-source network simulators simplify the setup and configuration of virtual machines and the networking connections between virtual machines. DevOps tools such as OpenStack do the same things, although they expose more of the complexities of the virtualized infrastructure to the user.
If you are already using DevOps tools for other activities you may find it useful to also use them when you need to create a simulated network instead of learning to use a network simulator.
Both open-source network simulators and a coordinated set of DevOps tools perform the same role: they orchestrate the setup, interconnection, and configuration of virtual nodes in a virtual network.
Open-source simulators are built to support small-scale simulation scenarios on one computer, although some can run in a distributed mode across multiple computers. DevOps tools are designed to work in datacenters composed of hundred or thousands of servers, Continue reading
The CORE Network Emulator has been updated to version 4.8. This new version fixes the issues I noted in my previous review of CORE release 4.7. It also implements some new features. See the CORE 4.8 release notes for all the details.
The most visible change is the addition of some new services — most notably a new Docker service that will allow Docker containers to be used as nodes in the simulation scenario.
I’ve written a lot about the CORE Network Emulator and all my previous posts are still relevant to CORE 4.8 — except where I discuss the bugs in previous versions that are fixed in the latest release. If you have not used the CORE Network Emulator before, I suggest you read the following posts, in order:
This should get you started using the CORE Network Emulator. If you wish to learn more, please read my other posts about CORE and consult the CORE documentation.
One can Continue reading
The Cloonix development team released an update to Cloonix version 26 in May 2015. An important addition in version 26 is a greatly expanded and improved Cloonix user guide.

The new version also changes the user interface, adds a new LAN type, and eliminates the t2t device. It also includes updated guest virtual machines.
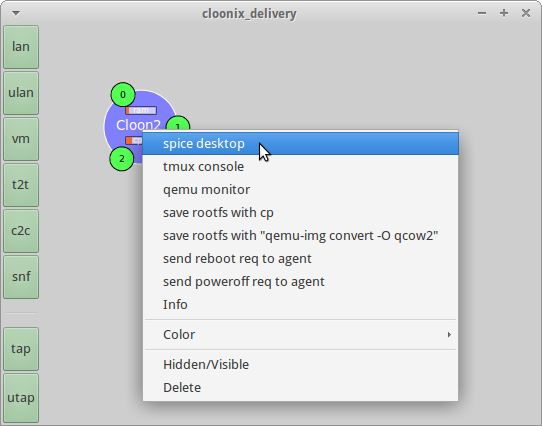
In Cloonix Version 26, the user interface eliminates the tool bar and makes all graph objects available via a right-click drop-down menu.

Right-click to access the virtual network object menu

Cloonix v26 KVM configuration window
The only change to the install procedure is a some new prerequisite software packages that must be installed to support compilation.
You can install pre-compiled binaries or compile Cloonix from source code. I prefer to compile it. The source code and the precompiled binaries are on the Cloonix Software page.
To compile the source code on Xubuntu 14.04, I followed the procedure documented in the Cloonix install documentation.
We will install Cloonix v26 in our Home directory. Download and unpack the source code.
When a researcher uses the Mininet network simulator to create a network of hosts and switches connected to an SDN controller, he or she may wish to be able to see what the simulated network topology looks like.

The POX SDN controller includes a component that will send network topology data to the Gephi data visualization platform, which can the show a graph of nodes and links representing the network topology. In this post, I will show how to set up POX and Gephi so we can see the network topologies created using the topology options in the Mininet command.
While we work through this tutorial we will also see how the POX SDN controller, which does not offer a native Northbound API, can use POX components to provide northbound interfaces.
This tutorial assumes you already have the following. I include links to relevant posts if you need to review any of these requirements.
This post describes how to install the Gephi graph visualization utility on the Mininet 2.2 virtual machine.
I want to investigate the node and link discovery function of OpenFlow and, to do that, I plan to experiment with some components of the POX SDN controller that interface with the Gephi graph visualization utility. Previously, I set up the Mininet network simulator, which includes the POX SDN controller. The final step is to install Gephi on the Mininet virtual machine.
Unfortunately, I found that the install instructions on the Gephi web site do not work. So, I used another procedure to solve the Java issue I encountered and complete the installation.
Log into the Mininet VM via SSH with X forwarding. If needed, review my previous post about setting up the Mininet VM. Ensure both the NAT interface and the host-only network interface are connected.
Gephi runs on Java but Java is not installed in the Mininet VM, which is based on a minimal installation of Ubuntu Server 14.04. So we must install Java.
The Gephi documentation states we need to use the Oracle version of Java, which is not available in the Continue reading
In this tutorial, we will demonstrate basic software-defined networking (SDN) concepts using the POX SDN controller, POX components, and the Mininet network simulator.

We will show how to use the POX SDN controller to create software defined networks that can be used to forward packets from one host to another and create flows on the SDN switches in the network. We will use the Mininet network simulator to create the network of emulated SDN switches and hosts that will be controlled by the POX SDN controller.
Mininet is an open-source network simulator designed to support research and education in the topic of software defined networks. If you are not already familiar with Mininet, you should review the following posts before starting this tutorial:
More information about Mininet is available at the Mininet web site.
POX provides a framework for communicating with SDN switches using either the OpenFlow or OVSDB protocol. Developers can use POX to create an SDN controller using the Python programming language. It is a popular tool for teaching about and researching software defined networks and Continue reading
The Mininet network simulator includes MiniEdit, a simple GUI editor for Mininet. MiniEdit is an experimental tool created to demonstrate how Mininet can be extended.

To show how to use MiniEdit to create and run network simulations, we will work through a tutorial that demonstrates how to use MiniEdit to build a network, configure network elements, save the topology, and run the simulation.
You should already be familiar with Mininet before trying to use MiniEdit. If you need some basic information about Mininet, please read my Mininet overview.
Before starting this tutorial, you should have already started the Mininet VM and connected to it via SSH with X forwarding enabled. If you need to learn how to do this, please read my post describing how to set up Mininet. If you want to use Mininet on an Amazon EC2 server, please see my post about installing Mininet on Amazon EC2.
The MiniEdit script is located in Mininet’s examples folder. To run MiniEdit, execute the command:
$ sudo ~/mininet/example/miniedit.py
Mininet needs to run with root privileges so we started MiniEdit using the sudo command.
MiniEdit has a simple user interface that Continue reading
To install the Mininet SDN network simulator on a remote server running on Amazon’s EC2 cloud1, follow the procedure shown below. After installing it, I did some basic tests and it seems that Mininet works well on the Amazon EC2 server.
From my laptop PC, I connect to the Amazon EC2 instance via SSH. In the example below, the server’s private key file AWS-PrivateKey.pem is stored in the folder ~/AWS and the server’s public IP address is 55.155.1.55. I had previously created a new user brian on the server.
brian@Laptop:~$ ssh -X -i ~/AWS/AWS-PrivateKey.pem [email protected]
To install the latest stable version of Mininet, plus all supporting software, execute the following commands on the Amazon EC2 server running Ubuntu Server 14.04.
brian@AWS:~$ sudo apt-get install git
brian@AWS:~$ git clone git://github.com/mininet/mininet
brian@AWS:~$ mininet/util/install.sh -a
To test the installation, run the following command:
brian@AWS:~$ sudo mn --test pingall
The benefit of installing Mininet on a remote server such as an Amazon EC2 instance is that I can now experiment with Mininet from any computer, including a tablet or smartphone, at any time as long as I have a connection Continue reading
I recently configured an Amazon EC2 instance so that I could run the XFCE desktop environment on it and control it from my local laptop computer using SSH and VNC. But what if I want to use my iPad to do control the remote Amazon EC2 server?
I want to experiment with complex network simulations running on open-source networking software when I happen have the time, from any location with a WiFi connection. I do not always have my laptop with me, but I usually have either my iPad or iPhone.

In this blog post, I will show how to configure and use an iPad (and iPhone) VNC viewer app to view and control the desktop environment running on my Amazon EC2 server.
 To connect to a remote server from an iPad, we need a VNC viewer app. The VNC viewer app I use is Screens.
I use the Edovia Screens iPad app, which displays the full-screen desktop environment running on the remote server. There are other VNC viewer apps in the App Store but Screens seems to have a lot of functionality and I was confident it would support SSH tunneling. Screens is also a universal iOS Continue reading
Having set up an Ubuntu Linux server running on a free micro-instance in Amazon’s Web Services EC2 service, I’d like to see how some of the open-source network simulation tools I’ve been using work in the cloud.
First, I will install the CORE Network Emulator on my Amazon AWS EC2 virtual private server. Please read the rest of this post to see how it works.
I expect that the CORE Network Emulator will install and run on an Amazon EC2 instance because it uses Linux Containers (LXC) as its virtualization technology. I have already observed that LXC containers work when run inside a virtual machine on my Laptop computer. It should work the same when running in a virtual machine in Amazon’s EC2 cloud computing service.
I’ve already described how to install the CORE network emulator in previous posts so I will list the installation steps below without any explanation. For details, please see my post on how to install the CORE Network Emulator from source code.
$ sudo apt-get update
$ sudo apt-get install bash bridge-utils ebtables
  iproute libev-dev python tcl8.5 tk8.5 libtk-img
  autoconf automake gcc libev-dev make python-dev
Continue readingIn a previous post, I showed how easy it is to set up a remote server on Amazon’s AWS service. Now I would like see if I can run one or more of the open-source network simulators I’ve been using on this remote server. I want be able to access a network simulator from any device such as a personal computer, a tablet, or even a smart phone.
To accomplish this, I first need to install a Linux desktop environment on the remote Ubuntu server. Then, I need to set up the server and my client devices to allow the graphical user interface displayed on a remote server to be viewed on a local client.
In this post I will show how to install a Linux desktop (in this case, XFCE) and how to set up either VNC or X11 on a server and client.
In this example, I chose to run the XFCE desktop environment on the Amzaon AWS remote server because XFCE uses less resources than other desktop environments such as Gnome or KDE.
There are two common methods for accessing a remote server’s graphical user interface:
I recently set up a free Amazon AWS server. As I experimented with it, I installed a GUI desktop. Then I encountered some issues that I eventually resolved by creating a new user with its own password and then using that user for the rest of my activities.
For my own reference, and in the hope others will find it useful, here is the procedure I followed:
I posted the details in my blog post, below.
The default ubuntu userid does not have a password. The Amazon AWS documentation on managing users recommends creating new users with password disabled. So, why set up a new user with a password?
After installing a GUI desktop, you need to a use a password to authenticate operations performed by GUI software such as Ubuntu Software Center. I did not see any problems caused by configuring a user password. I found it was best to work in a “normal” Linux user account that has a password.
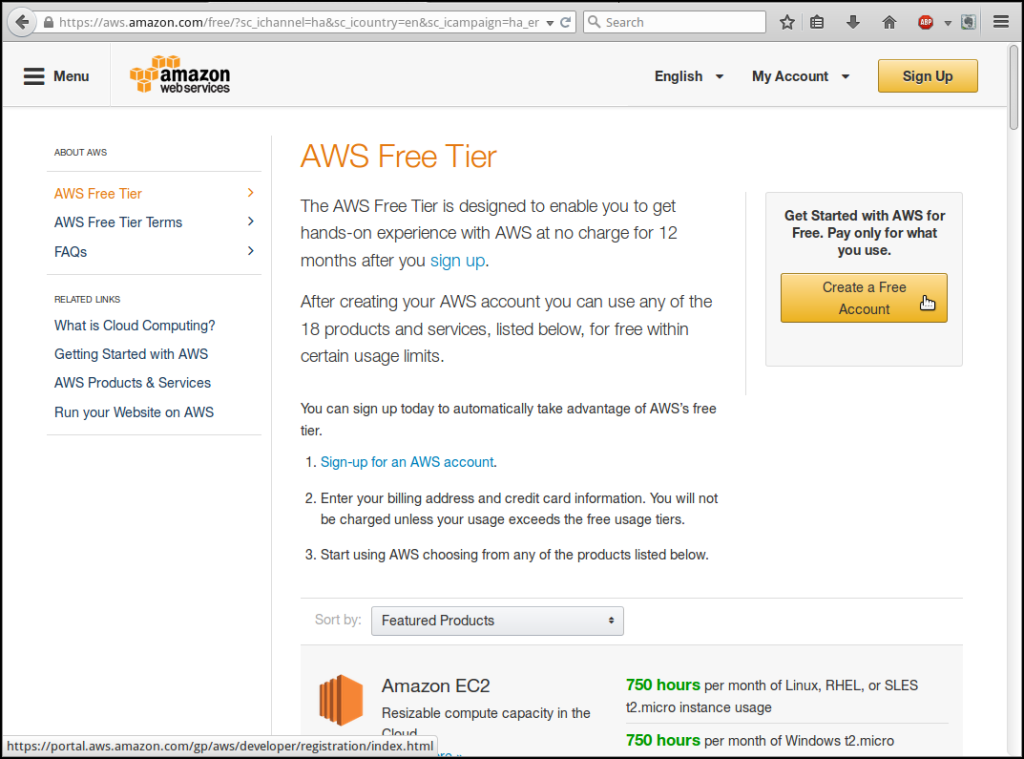
As an incentive to use their service, Amazon Web Services offers new users a “free tier” of service that provides a VPS “micro-instance” at no cost for one year.
The free tier of service is fairly flexible. Amazon AWS provides enough free hours to run the micro-instance twenty-four hours a day for a year. But if a user needs more services, he or she may create multiple micro instances and run them concurrently, which multiplies the rate the user consumes hours.
In this post, we’ll show how to set up the free server, and how to connect to it using SSH.
The first step is to create a user account on AWS. Go to the AWS Free Tier web page and click on “Sign up for AWS Account”
Then, click on “Create a free Account”.
Click on the “Free Account” button
Follow the directions provided on the AWS web site to set up a user account. You need to have a mobile phone for identity verification.
If you already have an account on amazon.com, you can use your already existing account to log into AWS services.
Amazon AWS provides excellent Continue reading
After installing the Mininet software-defined network simulator on a virtual machine, you may want to build the documentation. Documentation is available on the Mininet web site but, if you installed a beta version of a new development release or installed an old version, you may want to use the documentation specific for the version you are using.
Mininet documentation is built into the source code and can be generated using the doxypy program. This post details the simple steps required to install doxypy and other required software, and to build and view the documentation.
Start the Mininet virtual machine and log into it via SSH. See my previous post about setting up the Mininet SDN Network Simulator virtual machine.
On the Mininet VM, run the following command to install doxypy, and supporting software packages:
$ sudo apt-get install doxypy doxygen doxygen-latex help2man
This could take a while because it downloads over one Gigabyte of data, such as fonts.
On the Mininet VM, run the following command to build the documentation
$ cd ~/mininet
$ make doc
This builds a PDF version of the documentation named refman.pdf in the folder: ~/mininet/doc/latex/.
Most people who use the Mininet network simulator will download and set up the Mininet virtual machine image. However, there are times when we may want to use a different version of Mininet than the one already installed in the Mininet VM.
For example, we may want to use the newest features of Mininet currently being developed. The Mininet project releases beta-quality source code that user can download and install themselves.
This post will show how to install Mininet 2.2 Beta on a virtual machine image running Ubuntu Server. The steps described below should work for any version of Mininet that the user wants to install.
Warning: Do not install Mininet on your host computer. Install in in a virtual machine.
The Mininet install script may overwrite files in your home directory (depending on what you already have installed)1. If Mininet makes changes that cause problems on an existing virtual machine, you can just delete the VM and try again with a fresh Ubuntu Server image. But, if you install Mininet directly on your host computer you may cause problems.
In my own experience, I tried installing Mininet on my Continue reading
When running services on nodes in a CORE Network Emulator scenario, we may wish to customize the services configurations.
Some reasons why a user may customize CORE services are:
To show how to customize CORE Services, we will work through a detailed tutorial that shows how to customize the IPForward service. We will work through the same steps required to customize any other CORE Service.
The IPForward CORE Service provides a script that runs when the node starts in a simulation scenario. The script sets the IP Forwarding kernel parameters so that the node will forward packets from one port to another, according to the routing table on the node. The IPForward script is a default service on the Router node type.
The default IPForward CORE service has limited functionality: it can start IP forwarding on a Continue reading
CORE Services is a feature of the CORE Network Emulator — an open-source network simulator — that configures and starts processes on each node running in a network simulation. Examples of processes supported by CORE Services are: quagga, dhcpd, or radvd.
Because the CORE Network Emulator implements its virtual nodes using a lightweight virtualization technology called Linux namespaces, we cannot use the normal init or upstart scripts to start networking daemons on these nodes. We must use CORE Services.

A benefit of using CORE Services is that they allow us to set up and manage processes running on each node by using the CORE GUI. This may reduce the time required to configure nodes used in a simulation scenario, especially if a large number of nodes require similar configuration procedures. Also, network scenarios that require customized configurations can be saved and used again if those configurations are implemented by customizing CORE Services.
To run complex network simulation scenarios, we must understand how to use CORE Services. In this post we will provide an overview of CORE Services.
CORE Services are used to start processes on the virtual nodes in a CORE network simulation. For the processes Continue reading
The CORE Network Emulator development team released CORE version 4.7 in August 2014. I installed this new version of CORE on a newly-installed Linux 14.04 system and tested some of the new features.

In this post, I list the new features that are most relevant to researchers who use the CORE GUI to set up and run network simulations. I also list some of the defects that I found, along with workarounds.
The following are the most updates and new features most visible to users like me, who use the CORE GUI. There are many other updates and new features so read the CORE 4.7 release notes to review all the changes in CORE 4.7.
The CORE team made some major improvements to the way link effects are implemented. This alone is worth upgrading to CORE 4.7. The changes are:
The occasion of my fiftieth post is a good milestone to pause and look back on the two years since I started blogging about open-source routing and network simulation. I will review the blog’s performance statistics and reflect on why I started this blog and what I want to do next.

The chart above shows the blog traffic over the past two years, starting in August 2012. In the first year I thought I would reach only a small audience but, as I posted more content, more users found my blog. In the past twelve months, 29,500 unique users visited this blog. Traffic grew steadily almost every month in the past year.
Users from almost every country on Earth have visited this blog. The map below illustrates the number of users in each country who have visited the blog during the past twelve months, with shades of blue representing the number of users.

I considered writing a technical blog after listening to the audiobook Crush It! by Gary Vaynerchuck, read by the author. The audiobook was very inspirational and made me understand that writing a blog could be a positive experience.
The next book I read was Technical Blogging Continue reading
The Cloonix open-source network simulator uses the Spice remote desktop system to provide a virtual desktop connection to quest virtual machines that run a graphical user interface, such as Microsoft Windows or a Linux desktop environment.
To use a graphical desktop user interface on a guest VM, we access the VM using the Spice desktop console.
We must be running a guest VM that has a desktop environment installed and the Spice server installed.
We already upgraded a root filesystem with the XFCE desktop in a previous post. So, in this example, we will use that filesystem, which is named jessie-networking-xfce.qcow2 and is saved in the cloonix bulk directory.
Start the cloonix graph interface (see instructions for starting cloonix). Configure the VM object to load the jessie-networking-xfce.qcow2 filesystem.

Configure VM to use filesystem with desktop already installed
Then drag the VM object onto the graph interface so it starts up.

A Cloonix guest VM is now running
Right-click on the VM and select the Open Spice desktop menu command.
Open the Spice desktop console on the guest VM
The Spice console will Continue reading